Drawers Part 3 (Slide-out Building)
I’ll start this section out by apologizing for doing a poor job of documenting this. Translating my 3D design into real life with the wood and drawer slides ended up taking well over 2 full days in the garage, and I got to the point where I just wanted to finish.
When we left off, we had the drawer frame built and it was time to build the pull-outs. After a bit of research and a few trips to home depot, I decided on a 1/2” birch plywood for the drawers. The 1/2” would help keep the weight down while the Birch (a traditionally heartier plywood) would help keep the rigidity I needed. So I bought a bunch of sheets and went to town.


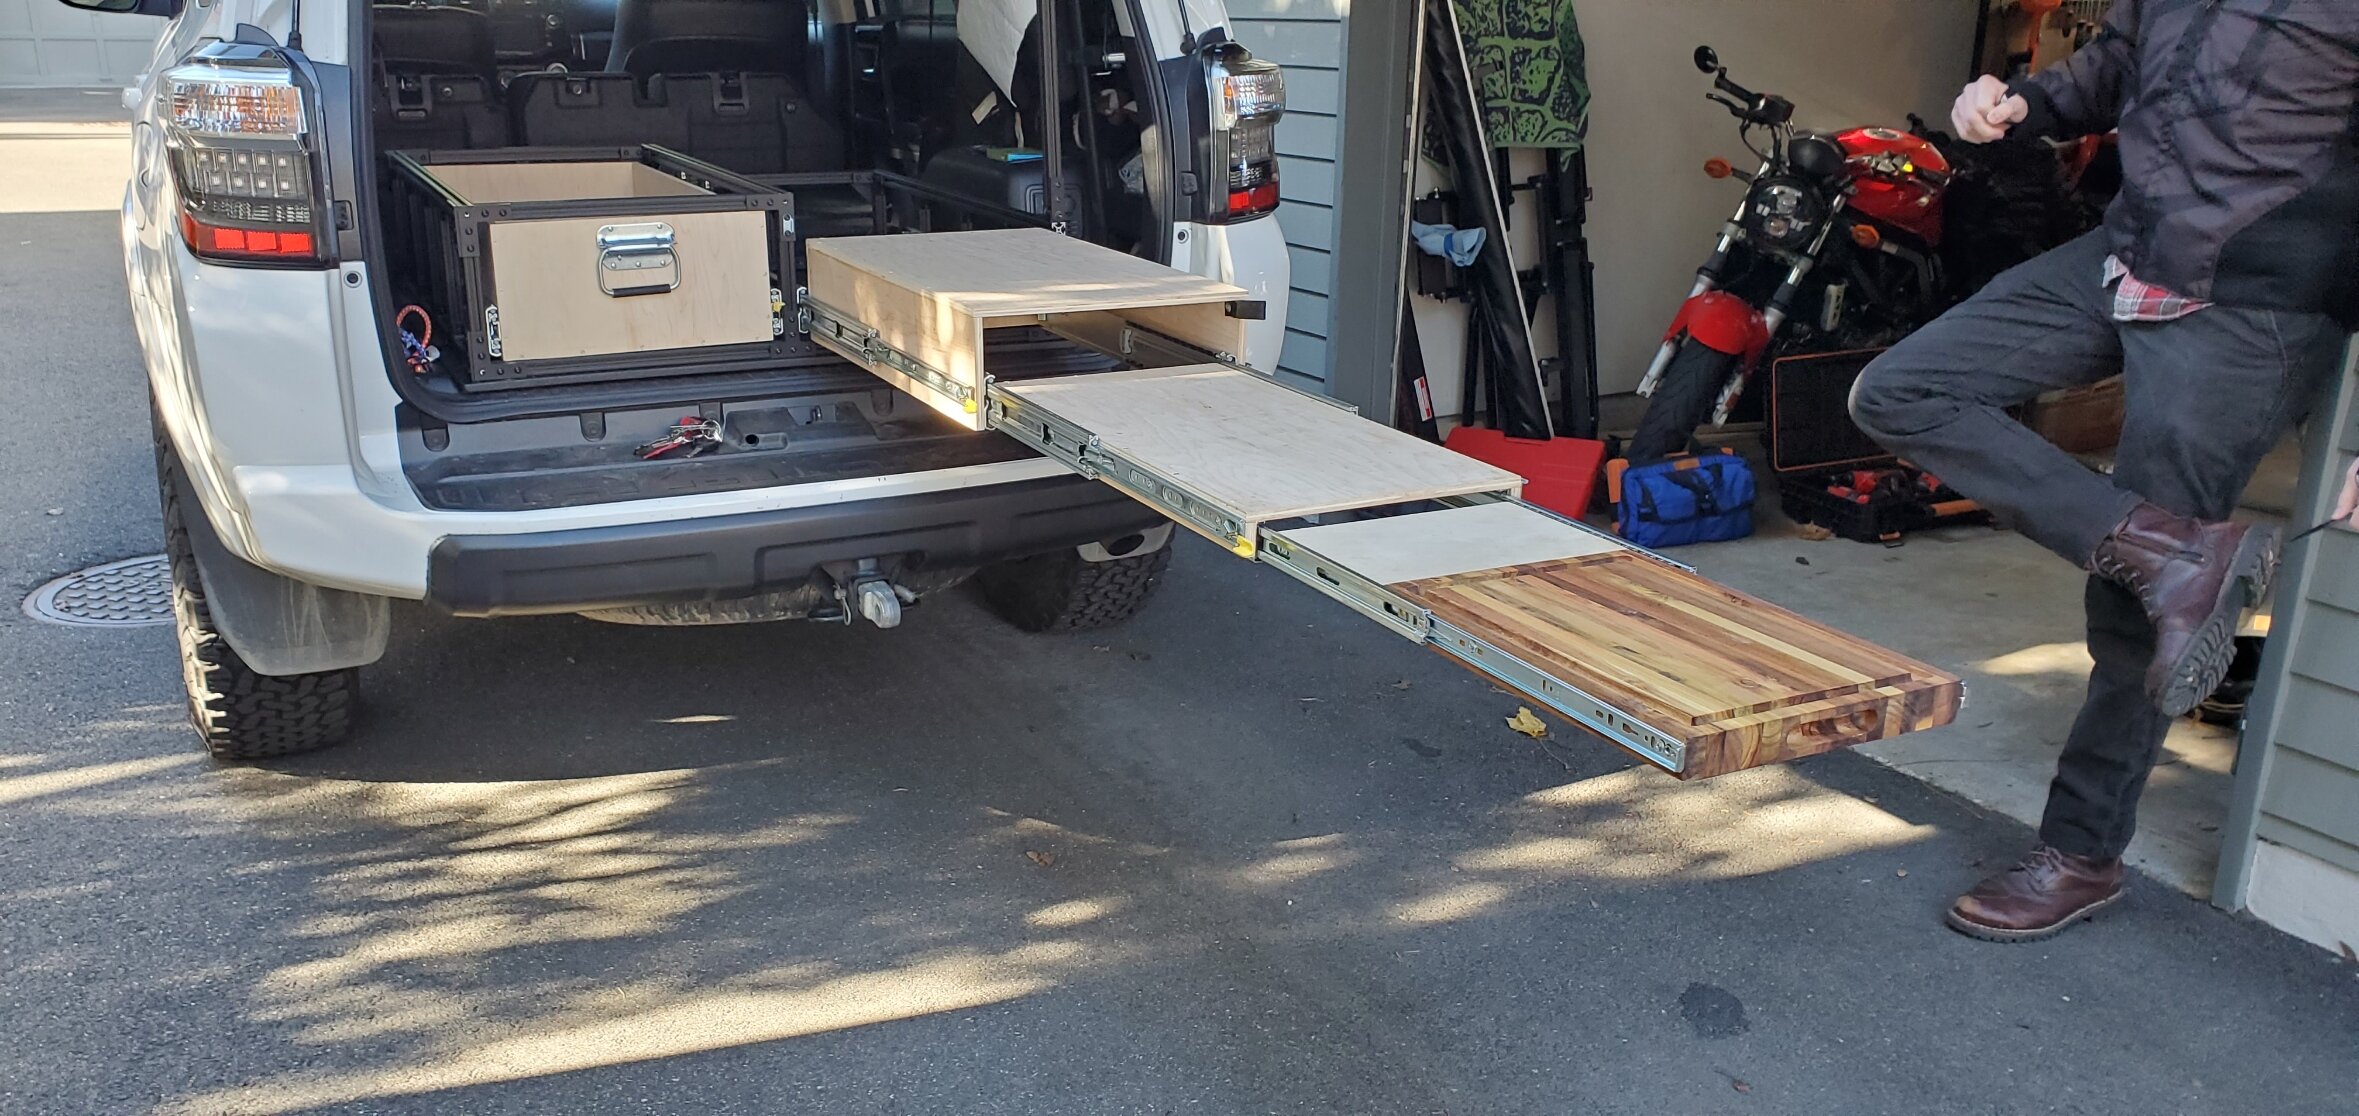
The plan was to build one large “catch-all” drawer on the left, and then a tiered kitchen slide on the right. This kitchen slide was going to include a platform for the fridge, a secondary pullout for my partner steel stove, and then an additional pullout with a cutting board. I decided to get some BEEFY lock-in/lock-out drawer slides from McMaster-Carr for all of the slides except for the cutting board. The cutting board (which is just a 1.5” thick block from amazon) has a slide that detents out, making it more difficult to accidentally shut it.
I am beyond thankful that I took the time to design this in 3D because I had almost all of my measurements ready to go before even starting. I started by getting the main drawer slides on either side mounted, and then building the main drawer and the fridge slide. Easy enough.
After that, I worked on the rest of the kitchen slide, including the stove slide and the cutting board pull-out. This was where things got a bit tricky. I had to start mounting things in reverse order, as once I bolted certain pieces in, accessing the holes for the drawer slides would be nearly impossible. So we started sending screws into their final homes and then mounted up the final drawer slides to either side. Again, I don’t have a ton of photos for this section as it was quite a tricky endeavor. To get things lined up, we had to use all kinds of shims and makeshift levers to pry things up, so not the easiest thing to photograph even with an extra set of hands.


After we got everything mounted, we threw it into the back of the 4Runner and started bolting it down. This was definitely the easiest part, although surprisingly time consuming. Who knew sending 16 bolts into the Goose Gear plate and another 16 into the t-slot would take so much time lol. All in all though, I’m incredibly hyped with how they turned out. And don’t worry! I didn’t have time to make a topper for the left side drawer, but it is coming in a later part!